This post may contain affiliate links. If you click through a link and make a purchase, I may receive a commission at no additional cost to you. As an Amazon Associate, I earn from qualifying purchases. Read the full disclosure here.
Les Mills Body Pump is a full-body strength class that highlights the major muscle groups of the body. The class uses a combination of barbells, free weights, and body weight exercises for a challenging and effective total body workout.
But when you have shoulder pain, many of the movements seen in a Body Pump class can be uncomfortable, and you may find yourself wondering if you should even be taking the class.
As a physical therapist and fitness instructor that’s been taking Les Mills Body Pump for over 15 years, I can confidently say that I see people in every class struggling with shoulder issues.
The good news is, there are many options to modify for shoulder pain throughout the class, including some tips that aren’t usually shared as viable options!
In this article, we’ll go track by track and take a detailed breakdown of the most common exercises, how the shoulders are involved, and options to reduce pain so you can be prepared with your own modifications for shoulder pain during Les Mills Body Pump.
You might be surprised at how involved the shoulders are throughout the class.
Disclaimer: This content is for educational purposes and is not medical advice. Read the full disclaimer.
This post is not sponsored. This is simply a compilation of my independent observations and recommendations as an experienced physical therapist and certified fitness instructor that has been taking Body Pump classes for over 15 years. I feel this information can help with injury prevention. This article is not affiliated with nor represents the opinions of Les Mills in any way. Now onto the good stuff!
The warm-up track
The warm-up is a preview of what’s to come throughout the class. It gets your muscles and joints moving for the more difficult strengthening ahead.
You’ll see movements like deadlifts, squats, upright rows, bent-over rows, clean and press, and lunges that will make an appearance in their respective tracks.
Warm-ups should be light to moderate weight.
If you’re brand new to Body Pump, start lighter than you think you need. You can always add weight throughout the workout or over the next few classes. But do keep in mind that Body Pump is a strengthening class, meaning you should be adding enough weight to feel some muscle fatigue throughout each track.
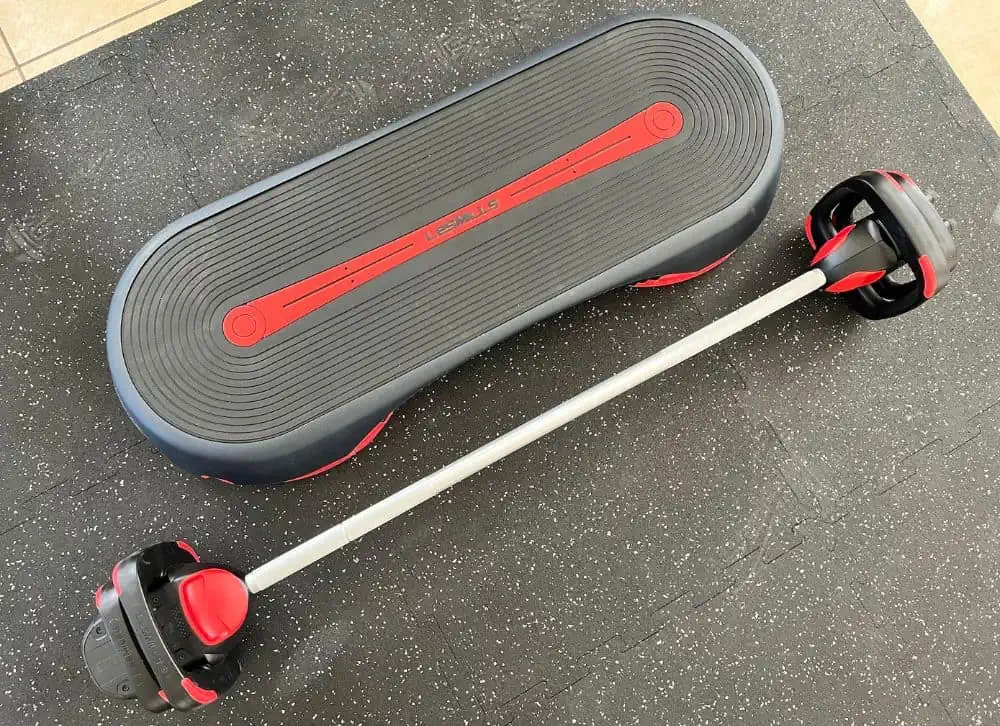
Another pro tip for Body Pump is to have some free weights nearby. Switching to free weights instead of the bar is one of the best secrets to alleviating shoulder pain with certain movements. You can even use extra weight plates as free weights.
During the warm-up, it’s good to take stock of how you’re feeling with each movement which will help guide your weight choices for each track for the day.
(Yes, your weight choices can be different from day to day, and it doesn’t mean you’re slacking off.)
If you’re new to Body Pump or have some concerns about your form, I recommend watching the Body Pump tutorial below from the Les Mills YouTube channel.
You can also access tutorials and workouts on Les Mills+ On Demand.
The squat track
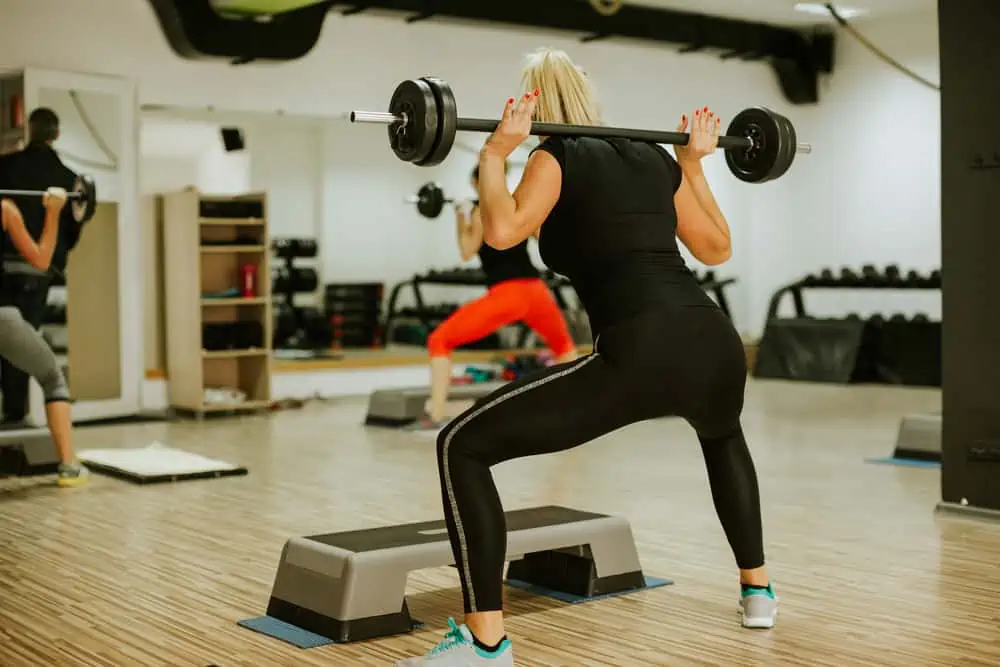
You may be wondering how the shoulders are involved in the squat track. I’ll give you a hint, it’s how you need to hold the barbell.
All of the squat tracks in every release spend most, if not all, of the track with the barbell placed on the upper back.
To stabilize the bar, you then hold the bar with your hands. This requires a decent amount of shoulder retraction and external rotation.
A healthy shoulder should be able to hold this position without a problem. However, a painful shoulder might start to notice discomfort with this position or possibly even see the elbows and shoulders round forward in an attempt to compensate.
Jutting the chin forward is another common compensation for limited mobility. After a few minutes, this may start to cause upper cervical spine tension and possibly headaches. To avoid this, try to look approximately 6 feet in front of you and keep the back of your neck long instead of trying to watch yourself in the mirror.
If your shoulders are painful during the squat track, here are some modification options:
- Use free weights balanced on your shoulders or hold them at your sides by your hips
- Hold a weight plate(s) at the collarbone
- Use a front squat technique where the bar is stabilized at the collar bones
- Use bodyweight only
The chest track
Frequent exercises seen in the chest track include chest presses with the bar, chest flies with free weights, and push-ups.
These exercises focus on building muscle through the pectorals and anterior shoulders.
With the exception of push-ups, most of these exercises are performed supine (lying on your back) on top of the step platform. (I recommend placing your mat on top of the step to cushion your vertebrae from the hard plastic.)
Depending on your comfortable range of motion and the angle of these exercises, they can be irritating to a painful shoulder, however, there are plenty of tweaks to minimize discomfort during this track.
Here are some easy modifications for the chest track:
- Don’t let your arms or elbows pass the level of the bench, as this may irritate shoulder pain. If you have difficulty sensing this range of motion, try just using your mat on the floor. This eliminates the extra space your arms can travel and decreases your range of motion.
- During chest presses, ensure that the bar is tracking over the middle of the chest. If it’s traveling up toward your neck or down toward your belly, this might start to aggravate the shoulders, especially with heavier weights.
- Modify your range of motion for pain-free movement
- Use less weight
- Try various hand placements and angles for push-ups
- For chest flies and A presses, control your range of motion and stop before the top of the bench to avoid aggravating existing shoulder pain.
The back track
The back track targets the muscles of the posterior chain, which is a fancy way of saying the muscles on the back of the body. It’s often a BIG track, with plenty of high cardio and high-strength movements to get your blood pumping.
The back track features compound movements such as deadlifts, clean and press, power press, and, more recently, high pulls.
Unfortunately, the clean and press is one of the most common Body Pump moves performed INCORRECTLY.
When performed properly, it’s a great full-body strength move. When performed poorly, it’s a setup for shoulder and elbow issues. (Don’t worry, there’s a foolproof video in this section, so just keep reading.)
The clean and press starts out like an upright row. You slide the bar up to your chest with minimal space between your body and the bar. Once the bar reaches the chest, you “clean” the bar by quickly wrapping your elbows back and down to then press the bar overhead.
The most important thing to note is that you’re not swinging the bar away from your body and curling it with your elbows! (This is a great way to get tennis elbow, by the way.)
A good test with this movement is to use a bar with no weight and stand facing the wall. You should be very close to the wall, only a couple of inches away from it. If you’re performing a clean and press properly, you won’t hit the wall.
Here’s a great video explaining how to perform the clean and press movement properly.
With tracks that feature sets of 4-8 clean and presses in a row, you can always work in bent rows if you’re shoulders are fatigued or you’re looking to limit overhead movements.
Moving on to upright rows.
Upright rows and high pulls are seen frequently throughout Body Pump, especially in the back and shoulder tracks. The problem with using a barbell for these exercises is that the barbell will keep your joints on a relatively fixed path. This is somewhat of a pro and con, depending on the situation.
And to be honest, upright rows are not even that great of an exercise for the shoulder, and there’s a lot of room for error.
A common mistake with the upright row is breaking at the wrist and pulling too high. To keep the work in the shoulders and back, keep the wrists neutral and stop just underneath the chest; for ladies, this is right where the bottom of a sports bra sits. For guys, this is about where the armpit of your shirt rests.
A common cue heard to execute the upright row is to “lead with the elbows.” This cue tends to have people raising their elbows higher than their shoulders. For me, this movement carries more risk than reward. Sure, not everyone will come away with shoulder pain, but there are better ways to work the lateral deltoids that don’t carry as much risk of developing shoulder pain.
Then there’s the high pull.
The high pull is more of a power move and kind of like a really aggressive upright row. Instead of just using a few muscles to raise the bar, there’s a quicker pull with a hip thrust and rising up on the toes. Again, with a barbell, there’s more room for shoulder irritation due to the fixed path.
Because of the added muscle groups and power associated with this movement, people do have a tendency to yank their shoulders more aggressively during a high pull. Remember to control the range of motion throughout the movement.
If there’s any joint discomfort, these exercises may not be the best option. Try substituting free weights for these movements if you have shoulder pain and allow your joints to travel a more natural path for you.
I can’t fault Les Mills for adding some of these more compound lifting movements into the program, but it’s important for beginners to learn proper form and work up to some of these more challenging exercises.
Modifications for the back track:
- Use free weights instead of a barbell
- Learn proper clean and press, upright row, and high pull form (hint: there’s no “swinging” away from the body with any of these.)
- Modify your range of motion for movements like upright rows and high pulls
- Pay attention to form tips


The triceps track
The triceps track focuses on the large muscle group at the back of the upper arm.
Common exercises seen across the triceps track include supine triceps extensions with the bar, overhead triceps extensions with a plate, dips, triceps push-ups, and triceps kickbacks.
Many of these exercises have the potential to aggravate a cranky shoulder, especially when performed incorrectly.
A lesser-known tip for shoulder pain with dips and triceps push-ups is to rotate your hands slightly outward and then squeeze your elbows close to your body. This may help change the angle of the shoulder to a more comfortable position.
For supine triceps work with the bar, I usually substitute with free weights. That’s just my preference since the bar keeps my hands in a pronated grip (palms facing down), and this aggravates my elbows. If I stack plates or free weights, I can hold them in a neutral grip (palms facing each other), which is more comfortable for me.
Even with supine triceps variations, controlling the weight is important to not aggravate a shoulder issue. It’s easy to move just a little too far overhead and irritate an existing rotator cuff issue. The video below does a great job of explaining the setup for supine triceps extensions.
When in doubt, standing triceps kickbacks tend to be the least offensive exercise to a painful shoulder.
The upper arm is stabilized alongside the torso, and the elbows move through flexion and extension. Even with the relatively “safe” triceps strengthening option, it’s still important to move slowly and not flail your arms; otherwise, the strengthening benefit decreases.
Here are some modification ideas for the triceps track:
- Swap standing triceps kickbacks for overhead triceps extensions
- Keep your hips close to your bench while performing dips
- Modify your range of motion for dips and push-ups
- Rotate your fingers outward for triceps push-ups and dips
- Try triceps push-ups from a tabletop position for a lighter option
The biceps track
The biceps track typically features various types of biceps curls, isometric holds, and occasionally bent-over biceps rows.
You always have the option to use the bar or free weights.
Substitute with free weights if there’s shoulder and elbow discomfort, as the bar keeps your arms on a fixed track. This isn’t a bad thing, but if there’s pain, you’ll want to be able to slightly adjust your movement to a pain-free range.
To work the biceps best, the elbows should be aligned with the waist or slightly forward. Bringing the elbows behind the torso takes some of the work away from this muscle group and may also cause the shoulders to round forward.
A common area of shoulder pain that often gets overlooked is proximal biceps tendonitis.
The long head of the biceps muscle attaches at the top front of the shoulder, and fibers even weave in with the glenoid labrum. This sometimes goes hand in hand with rotator cuff pain and can be a real nuisance with certain movements.
Modification options for the biceps track:
- Use free weights instead
- Alternate single arm curls
- Try different types of biceps curls as you fatigue (e.g., hammer curls and rotating biceps curls)
- Lower the weight
- Keep your shoulders back and your elbows slightly forward on your torso
The lunge track
Similar to the squat track, sometimes the lunge track gives the option to place a bar on the back or hold a weight plate at the chest. Some lunge tracks also feature and squat press or a lunge with an overhead press.
If either of these options causes shoulder discomfort, you can opt to hold a weight plate down at your side or ditch the weight altogether.
By this stage of the class, you’re probably starting to feel some fatigue, bodyweight is a great option.
Modifications for shoulder pain during the lunge track:
- Hold a weight plate at the collarbone
- Hold a weight plate down at your side
- Do bodyweight only
- Skip the overhead press
The shoulder track
By the time I get to the shoulder track, my shoulders are pretty beat from all the previous tracks that sneakily involve shoulder muscles.
I decrease my weight significantly here, even down to 2-3 lbs. for some movements.
Usual suspects in the shoulder track include overhead presses, lateral raises, reverse flies, push-ups, upright rows, and, more recently, rotator raises and Arnold presses. (We’ll talk about those in a minute.)
If there’s any concern with shoulder pain, I’d strongly recommend using a light weight by the time you get to this track. The reason being is that the shoulders have already gotten a lot of work throughout the class.
Injuries occur when the demand exceeds the body’s current capacity. Fatigue is a prime culprit in fitness injuries. When you’re fatigued, chances are your form is also beginning to break down, meaning that sloppy movements and compensation from other areas are likely to creep in.
One of the biggest mistakes I see with lateral raises and upright rows is the tendency to bring the elbows too high, placing the shoulder in a position of impingement. I’m not saying these moves will injure a shoulder, but if there’s any existing pain or compromised mobility, these movements tend to make shoulder pain worse.
Now let’s talk about rotator raises.
A few years ago, when this move first debuted in a Body Pump class, I had a lot to say about this movement (and still do).
A rotator raise involves a lateral raise with bent elbows, then maintaining that position while rotating the hands up toward the ceiling. (See the video below.)
Let me start by saying that this exercise is not inherently bad and can be a great strengthening tool for people with good mobility and no pain.
However, anyone with limited mobility or existing pain will find this movement difficult and increase their pain as they try to crank their shoulders into this awkward position. It’s also common for people to push their shoulders too far into this range, for example, if someone has a lot of flexibility.
The amount of people I’ve seen in classes grimacing as they crank their rotator cuffs into oblivion is astounding. It’s usually accompanied by excessive trunk extension in a desperate compensatory attempt to raise their arms just a little higher.
If you have limited shoulder mobility and/or existing pain, I would strongly consider some modifications for this movement. One easy option is to stick with a comfortable range for just the lateral raises, for example, 50% of your available range of motion. Or perform the entire movement with a modified range instead of forcing the shoulders into a painful end range.
You’ll still get the rotator cuff strengthening benefits with less aggressive force on the shoulder joint. You can always work your way up in strength and mobility.
Modification ideas for the shoulder track:
- Decrease your weight
- Use free weights instead of a bar
- Skip overhead movements
- Modify your range of motion through each exercise
The core track
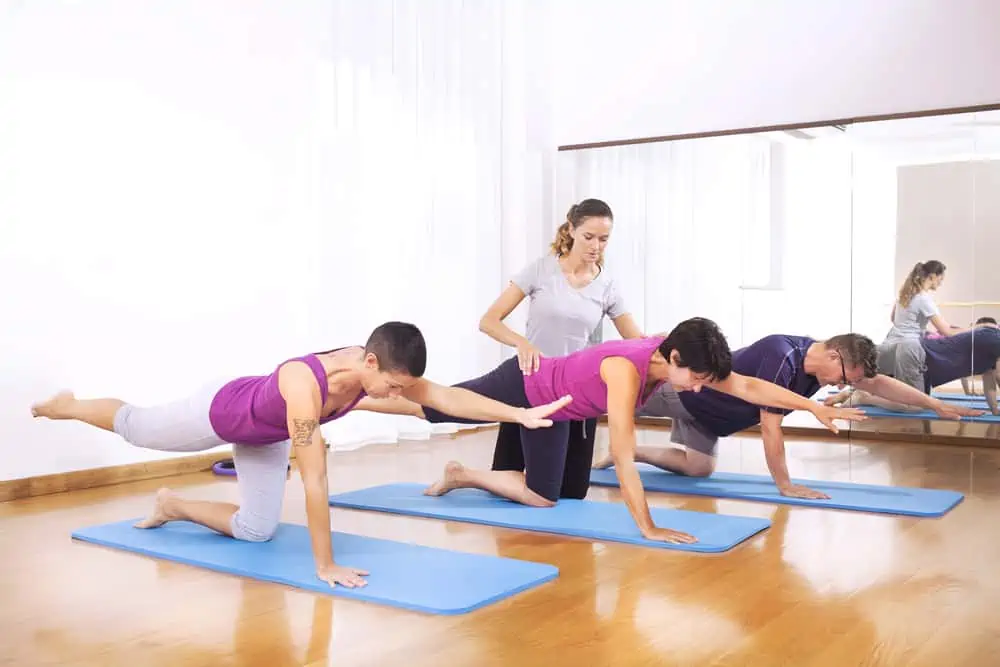
Various types of planks are seen throughout the core tracks, including side planks, regular planks, rotating planks, and mountain climbers.
Planks may be uncomfortable on a cranky shoulder. If dropping the knees down doesn’t make the movement more comfortable, then you can always lie down on your back and do a variety of abdominal exercises.
I bet if you take a look around the room, by this point in the class most people are doing their own thing anyway…
General injury prevention tips for Body Pump
Here are some additional injury prevention tips for Body Pump that aren’t just for the shoulders.
Choose the right weight
Body pump is a weight lifting class with the goal of strengthening. Use the proper weight that you can tolerate each day.
Too little weight decreases your control and won’t be enough for strengthening benefits. Too much weight may result in injury if you can’t control the weight and maintain proper form, resulting in dysfunctional compensations (using awkward movements or other muscle groups to accomplish the exercise).
Pay attention to weight recommendations provided by the instructor for each track and adjust based on how your body is feeling.
Prioritize form
If your form is poor, your strength benefits for a particular area will be poor. It’s just too easy to zone out and go through the motions instead of working with intent and focus. To maximize your efforts, pay attention to form tips by the instructor (and there are plenty of form tips offered).
Don’t flail, instead, use slow, purposeful movements and focus on putting your mind to the muscle that’s being worked in that track to ensure you’re targeting what you think you’re targeting. Believe it or not, it’s very easy to compensate and take the work out of the target area.
A common question in both physical therapy and fitness with exercises is, “where should I be feeling this?” Luckily, Body Pump is broken down into strengthening for specific areas.
On the Les Mills on-demand platform, there are body pump beginner videos that teach you the proper form for all of the common movements seen in this class.
Also, don’t sacrifice your form for quick transitions. A quick transition from one position to another can make you feel like you have to keep up with the pace of the class. Always make sure you’re set before lifting the weight; even if it means you miss a rep or two, it’s better than getting injured.
Listen to your body
If a movement truly doesn’t feel good to you, substitute it with another option. Not every move feels great for everyone, and that’s ok. Sometimes due to strength or mobility issues, movements just feel awkward.
Decrease your weight when you notice pain or fatigue that’s affecting your form.
Ask the instructor for modifications and form tips
Instructors generally provide several levels of options for each track, but they don’t have time to provide every individual modification option under the sun, especially if it’s a bit out of the box for Body Pump.
If you have a specific movement that you’re struggling with, ask the instructor for tips or substitution options before or after class, and they should be able to help you problem-solve solutions so that you can get the most out of the class.
Get to know pain vs. muscles working
Getting familiar with different sensations helps to improve body awareness and may help recognize the risk for injury at an earlier stage.
Strengthening is not meant to be easy; otherwise, no one would ever see strength gains. However, recognizing normal sensations that come along with it, such as pressure, fatigue, and a sensation of the muscles working, can help identify normally expected discomfort from pain.
Wrapping up
Body Pump is a great class for beginners to advanced and targets the major muscle groups of the body in a fun group fitness atmosphere.
Keep these modifications in mind to continue to enjoy this high-energy strength class and keep your shoulders healthy.
To start Body Pump classes, check your local gym schedule or try Les Mills+ On Demand!


Great suggestions. Thanks.