This post may contain affiliate links. If you click through a link and make a purchase, I may receive a commission at no additional cost to you. As an Amazon Associate, I earn from qualifying purchases. Read the full disclosure here.
Lower back pain affects up to 23% of the world’s adult population. Though back pain can come from a variety of different sources, up to 90% of lower back pain is mechanical or non-specific.
Mechanical or non-specific low back pain means that the pain is not found to be originating from something more serious, such as a fracture, tumor, or systemic issue, and is very likely musculoskeletal. In many cases, pain can be attributed to a lack of proper movement and exercise.
With that in mind, here are some of the best stretches for musculoskeletal lower back pain.
For specific issues such as lumbar disc herniation, sciatica, sacroiliac joint pain, or osteoporosis not all exercises apply. See the linked articles below for additional information.
- 13 stretches for lower back pain
- 1. Child’s pose
- 2. Cat Cow
- 3. Trunk rotation
- 4. Hip flexor stretch
- 5. Quad stretch
- 6. Figure 4 stretch (hip rotator stretch)
- 7. Hamstring stretch (with strap)
- 8. Thread the needle
- 9. Lumbar extension (sphinx, cobra)
- 10. Thoracic extension with foam roller
- 11. Glut muscle release using a foam roller or myofascial release ball
- 12. Open book stretch
- 13. Knee to chest
Disclaimer: This content is for educational purposes and is not medical advice. Read the full disclaimer.
13 stretches for lower back pain
Stretches are only as effective as your technique. In order for a stretch to truly be effective, you need to give your nervous system time to adjust and relax; this is typically 15-30 seconds before you start to notice your body “letting go.”
Overstretching is a common problem. You can’t “force” your body into letting go or becoming more flexible. In fact, the harder you push, the less effective it becomes.
Of course, not every stretch position works for everyone. For variations of these stretches, visit the exercise library.
Be sure to give my quick YouTube yoga for low back stiffness class a try (linked below).
1. Child’s pose
Child’s pose can be a very relaxing position for the spine as it gently unweights the muscles and joints of the lower back.
If knee or hip range of motion is limiting, try propping your hips up on a block or pillow and placing a pillow underneath the chest for comfort.
Widening the knees outward can provide more space for the torso to move forward and give a different sensation at the hips.
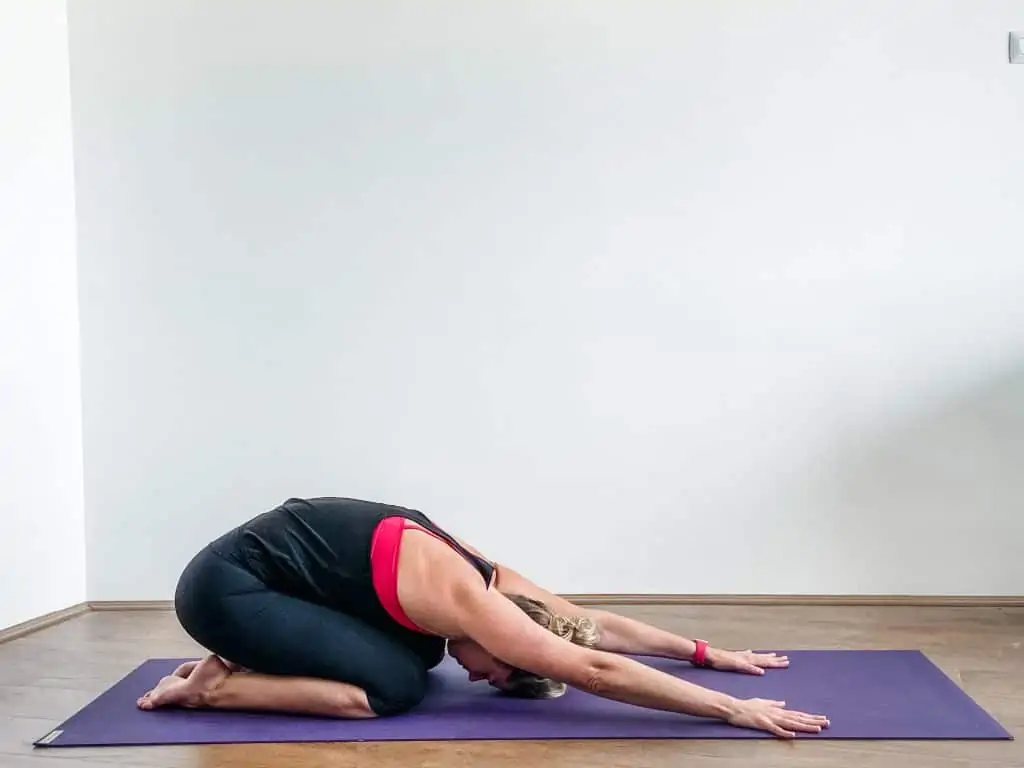
How to perform child’s pose
- Kneel on the mat with legs hip-distance apart or knees wide
- Bring your forehead down to the mat and either stretch the arms out in front or bring them down by your sides.
- Blankets, blocks, or bolsters can be used for further relaxation or to support for limited flexibility in the hips or knees.
- Focus on deep breathing in this pose, stay as long as you need.
2. Cat Cow
Cat cow is a great spine mobility exercise. It’s a gentle way to mobilize the spine through flexion and extension.
Many have difficulty isolating spinal movements in this position without bending the elbows or recruiting other areas of the body. Learning how to identify and control spinal movements is a useful tool to promote movement awareness and proprioception.
Cat cow is also a good basic movement to begin matching breathing to movement.
Cat cow can be modified for a seated position if kneeling is not available.
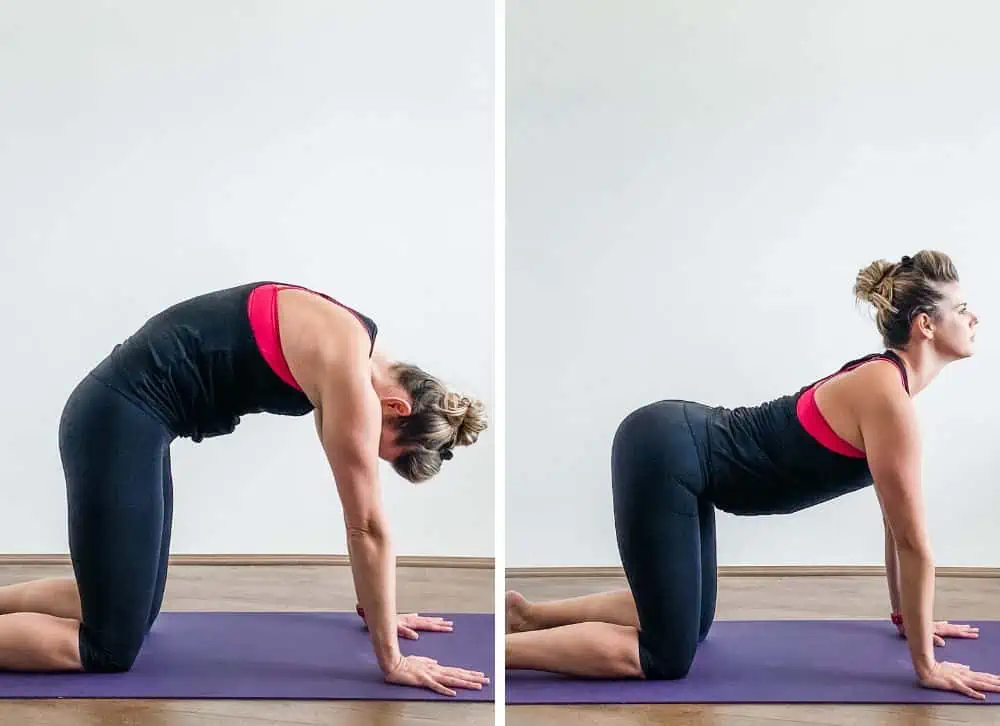
How to perform cat-cow
- Get into a tabletop position with shoulders stacked over wrists and hips over knees.
- For “cat,” exhale, round the spine, tuck the chin, and press the floor away.
- For “cow” inhale, drop the belly and lift the gaze.
- Slowly move through these two positions through as much range of motion that’s comfortable for you.
3. Trunk rotation
Rotation is a very functional movement for the spine. The majority of the movement comes from the thoracic spine and neck; however, there is a smaller amount of rotation that comes from the lower back.
How to perform trunk rotation
- Lie on your back with your knees bent and feet flat on the floor.
- Gently drop the knees to one side, with as much rotation as is comfortable for you. The feet do not have to stay flat; just allow them to follow the legs’ motion.
- Return your legs to the center and gently drop them to the opposite side.
- Repeat 10-20 times or until you feel an improvement in mobility.
4. Hip flexor stretch
The hip flexor group consists of the psoas major/minor, iliacus, rectus femoris, and sartorius. The iliopsoas (the collective name for psoas major and iliacus) is the strongest of the group.
There are many ways to perform a hip flexor stretch. The kneeling hip flexor stretch is one I commonly see performed incorrectly. Many bring the hip into extreme extension and arch the back; in reality, this is not the most effective position to stretch the psoas. In fact, this brings the endpoints of the psoas closer together and decreases the intensity of the stretch to this particular muscle group.
For other variations of this stretch, visit the hip flexibility library.
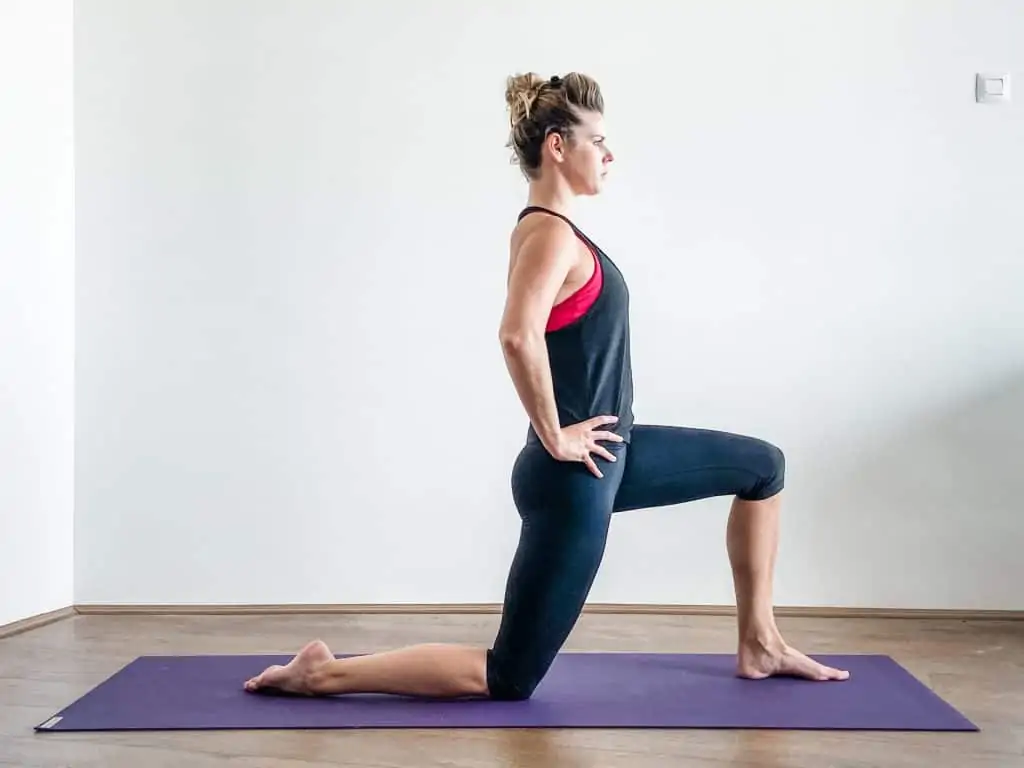
How to perform a kneeling psoas stretch
- Kneel on a padded surface or blanket for knee joint comfort.
- Step one foot forward at a 90-degree angle. (The kneeling leg will get the stretch.)
- Lift yourself up tall and roll the pelvis under (tuck under or posterior tilt are other cues).
- Maintain this position as you translate slightly forward until you feel a pulling in the front of the hip and thigh. If the right knee is down, the right hip will be the one getting the stretch.
- Hold for 20-30 seconds, keep breathing deeply.
- Repeat 2-3 times.
Related read: Why Are My Hip Flexors So Tight?
5. Quad stretch
A perception of tightness in the front of the body can contribute to lower back pain. Stretching the quads is
A quad stretch in prone is a great way to modify the stretch. It can be performed with or without a strap to further accommodate for knee range of motion.
This position allows you to relax more and focus on stretching.
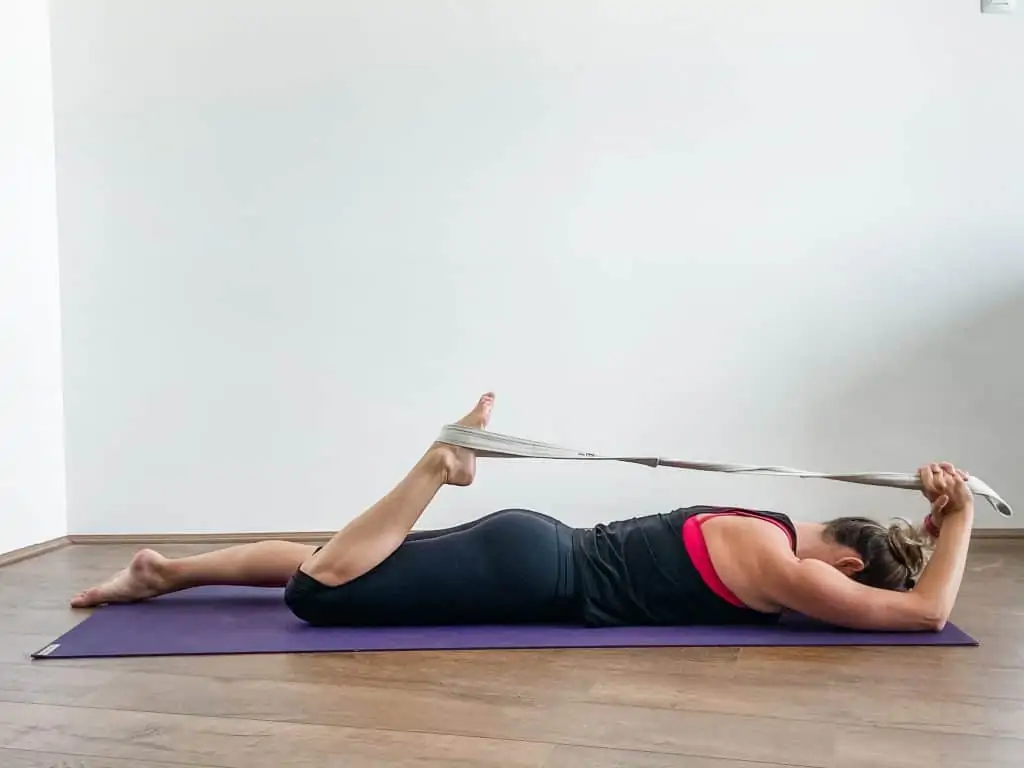
How to perform a prone quad stretch with strap
- Place a strap around the foot if using one, lie face down and draw the heel toward the glutes.
- Keep the knees in line for best alignment.
- Hold for 20-30 seconds.
- Repeat 2-3 times.
6. Figure 4 stretch (hip rotator stretch)
Hip flexibility plays a big role in lower back pain. Various hip stretches should be included in a well-rounded program.
How to perform the supine figure 4 stretch
- Lie on your back with your knees bent
- Cross one ankle over the opposite knee and flex the foot (this helps protect the knee joint)
- This may be enough of a stretch, or you might choose to push the knee away gently.
- For a deeper stretch, you can grab ahold of the opposite leg either with your hands or a strap and draw the knee closer to your chest.
- Hold 20-30 seconds.
- Repeat 2-3 times.
7. Hamstring stretch (with strap)
The hamstrings attach to the base of the pelvis, and the perception of tightness here can creep up toward the lower back. Sciatic pain can also be misinterpreted as hamstring tightness.
If your hamstrings feel chronically tight, be sure to check out this article to learn that there’s more to the equation than just stretching.
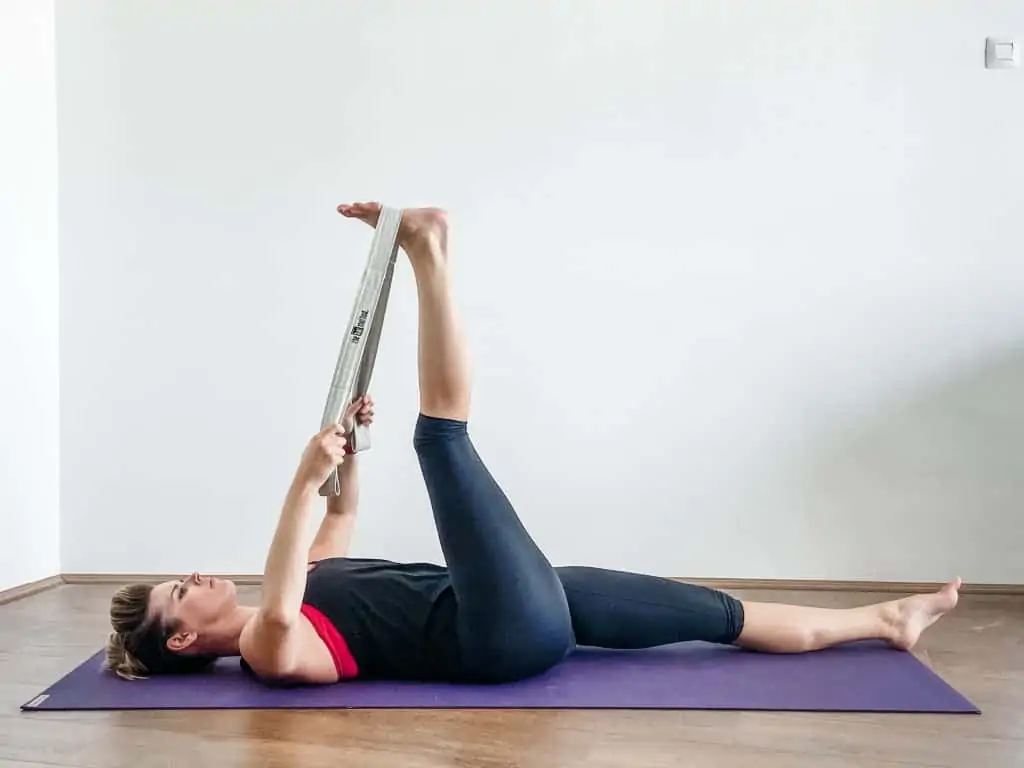
How to perform a hamstring stretch with a strap
- Lying on your back, place the strap around the middle of your foot
- Hold the strap and gently lift and straighten your leg until you feel a gentle pulling along the back of the leg.
- Hold for 20-30 seconds.
- Repeat 2-3 times.
8. Thread the needle
Thread the needle is one of the many ways to work on spinal rotation, especially in the thoracic spine. It’s a great option after a long day at the computer or driving in your car.
Though the thoracic spine is the middle and upper back, the spine is all connected, so a lack of mobility in one area can quickly transfer force to another area for compensation.
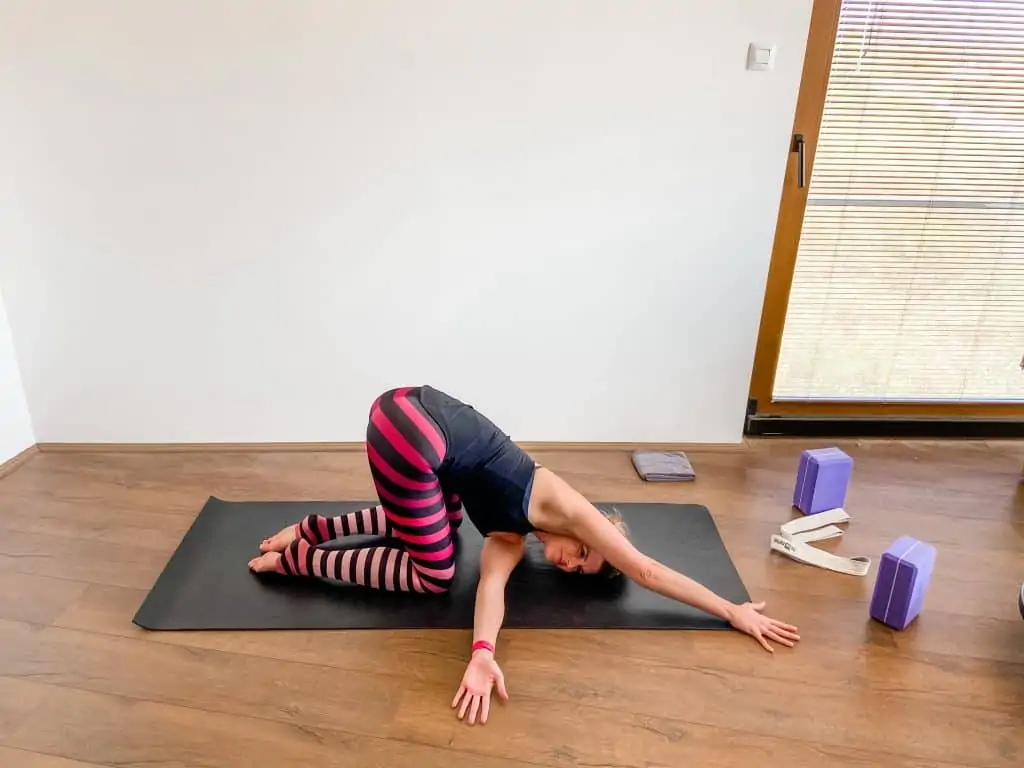
How to perform thread the needle
- Get into a tabletop position with shoulders stacked over wrists and hips over knees.
- Take one arm and thread it through the space between your opposite hand and knee.
- Come as far into the position as is comfortable, maybe dropping your ear down to the mat or a prop.
- Stay for 3-5 deep breaths.
- Return to tabletop and repeat on the other side.
- Perform 2-3x per side.
Deep breathing is especially important during this position as it helps to open up the ribs and facilitate functional thoracic mobility.
9. Lumbar extension (sphinx, cobra)
With so much time spent sitting, it’s pretty easy to start losing lumbar extension, especially if you don’t take the time to work on it.
Sphinx is a very gentle backbend into extension. In physical therapy, this may be called prone on elbows or a prone prop.
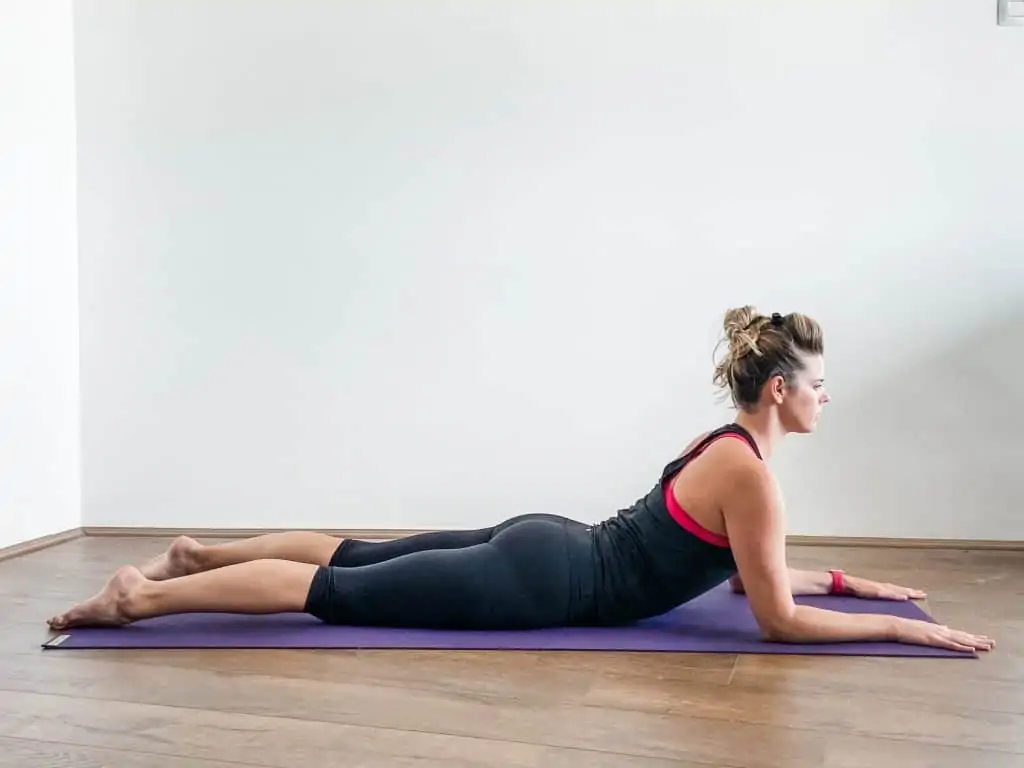

How to perform sphinx (prone on elbows)
- Lie on your stomach and bring yourself to prop on your forearms.
- Bring the elbows underneath the shoulders for the most extension into this position.
- Stay for 30 seconds to 1 minute, continuing to breathe deeply.
- Repeat 2-3 times.
Cobra is a more intense backbend than sphinx.
How to perform cobra (prone press up)
- Lie on your stomach and place your palms on the floor underneath your shoulders.
- Press into your hands to extend the spine as far as is comfortable for you, elbows do not have to be straight.
- Keep the shoulders away from your ears and pull the heart forward.
- Bend the elbows and lower yourself back down to the mat.
10. Thoracic extension with foam roller
Extension is one of those movements we just don’t get enough of throughout the day, so we need to put in some extra effort to give a spine some extra mobility in this direction.
Decreased mobility in the thoracic spine can contribute to back pain, neck pain, and shoulder pain.
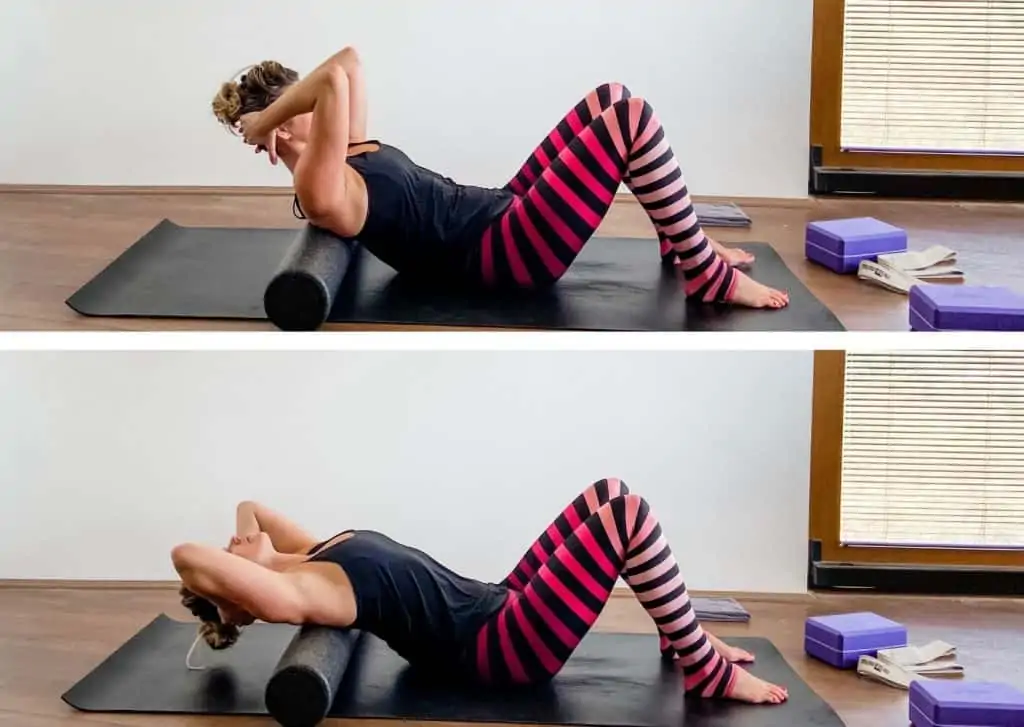
How to perform thoracic extension with a foam roller
- Sit on the floor and place the foam roller perpendicular to your spine at the shoulder blades level.
- Cradle your head and neck with your hands. You’ll want to keep your neck in neutral while performing this stretch.
- Gently roll back, extending over the foam roller only as far as you feel comfortable.
- Slowly lift back up and repeat ten times.
- Keep your bottom on the floor the whole time, and keep your gaze on the top of your knees to protect your neck alignment.
11. Glut muscle release using a foam roller or myofascial release ball
The perception of tightness or “trigger points” in the glutes and other small hip muscles can be a source of pain for the lower back and hips. By incorporating some foam rolling or massage work into your stretching routine, you might notice an improvement in mobility along with a decrease in pain.
Foam rolling tends to produce a quick neurological response that gives up the perception of less tightness and pain. This may help improve tolerance to stretching, mobility, and strengthening exercises as part of a warm-up series.
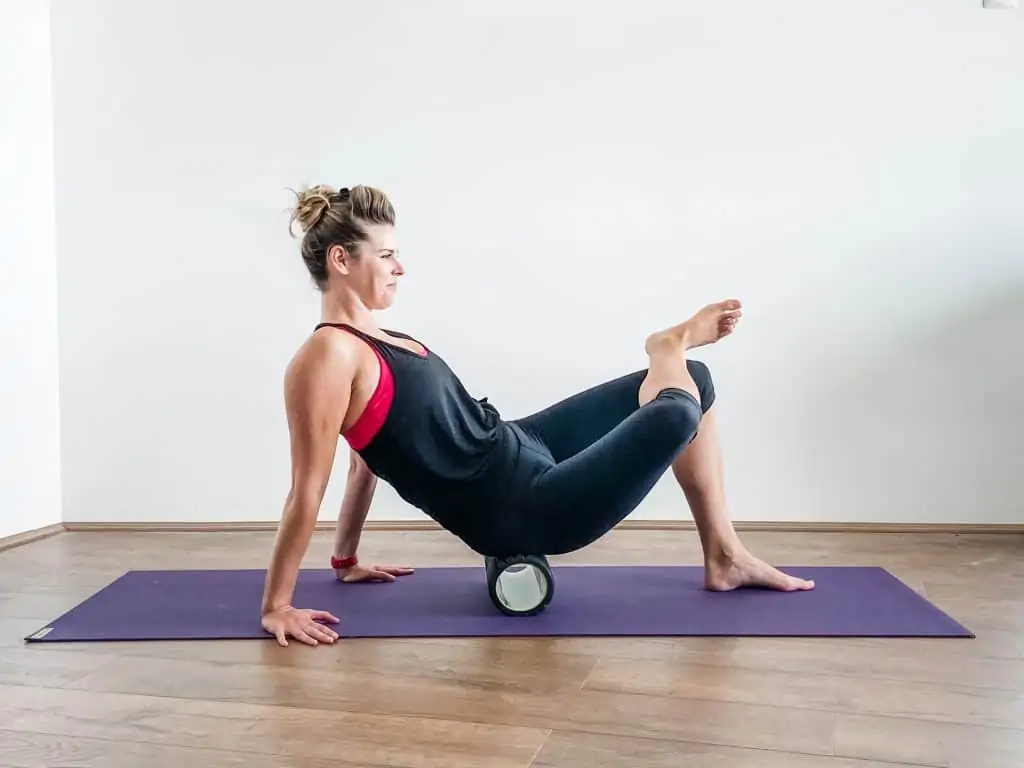
How to perform glut muscle release with a foam roller
- Sit on the foam roller and support yourself with your hands on the floor behind you. Your feet will also be flat on the floor as if you were in a “crab walk” position.
- One side at a time, shift over onto one glut and slowly roll back and forth.
- Crossing that ankle to the opposite knee in a figure 4 position will intensify the stretch.
- Aim for 30 sec to 1 min per area before moving on.
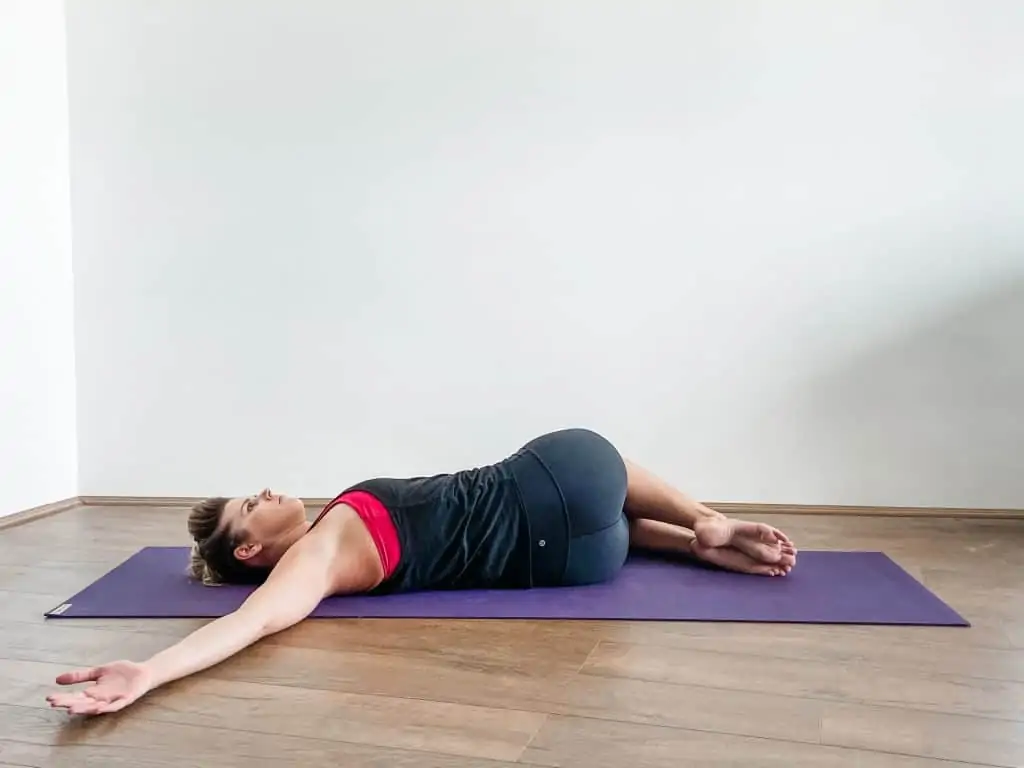
12. Open book stretch
This stretch is another accessible way to bring some rotation to the spine. By keeping the knees bent toward the chest, this helps to lock out the pelvis and keep the lower body still to ensure that all of the movement is coming through the spine, decreasing compensation through the hips.
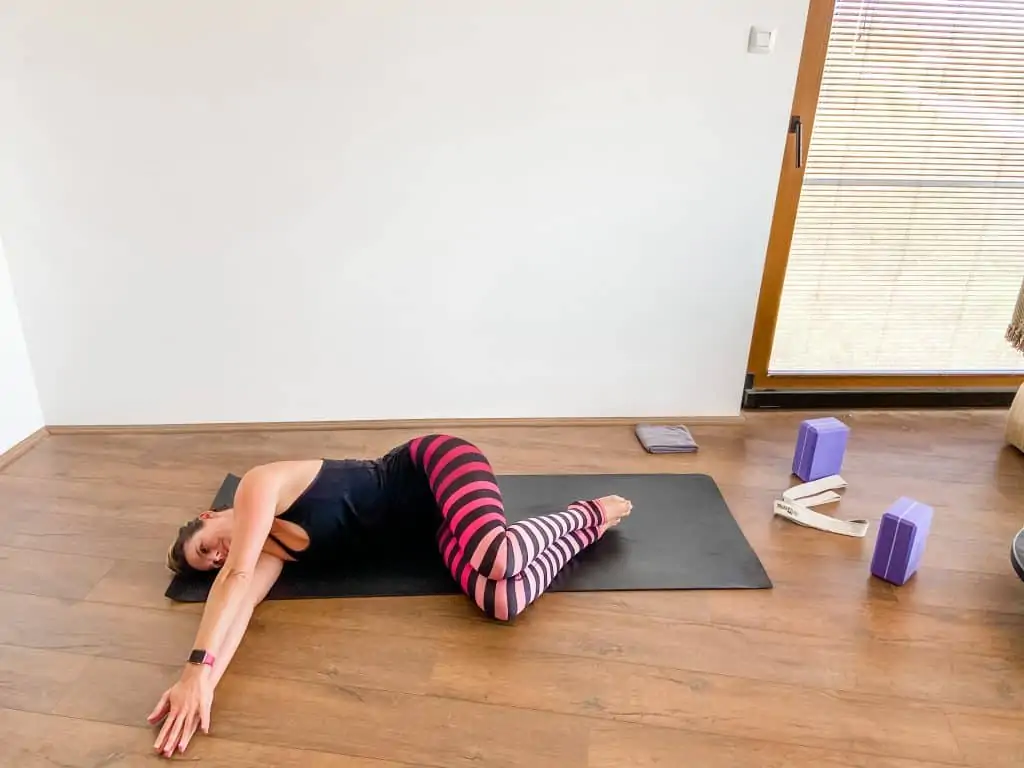
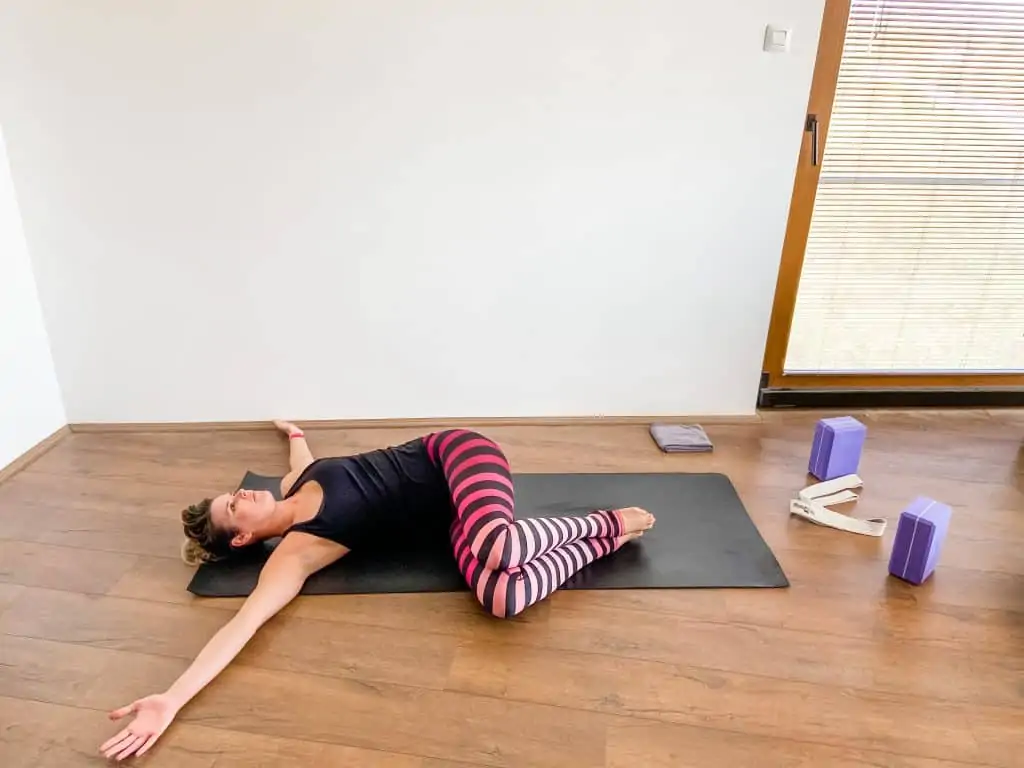
How to perform the open book stretch
- Lie on one side with your knees bent up to 90 degrees (Or however far is comfortable for you)
- Extend your arms at shoulder level and let them rest on the floor.
- Keeping your lower body still, raise the top arm and rotate to “open the book” as far as is comfortable. This can be intense for the shoulder, so you’re welcome to bend the arm at the elbow, or keep the palm against your chest to take out this piece.
- Take 2 deep breaths
- Slowly “close the book” and return to side-lying.
- Perform 10-20 on each side.
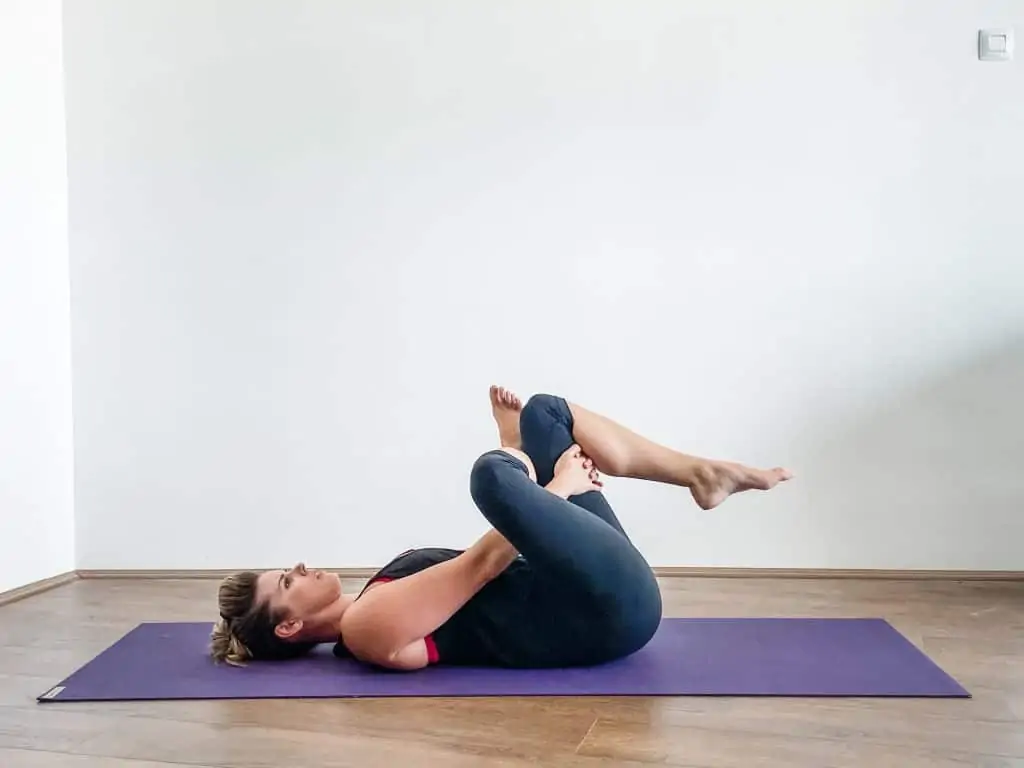
13. Knee to chest
Double knee to chest or single knee to chest is a stretch for the lower back and back of the hips.
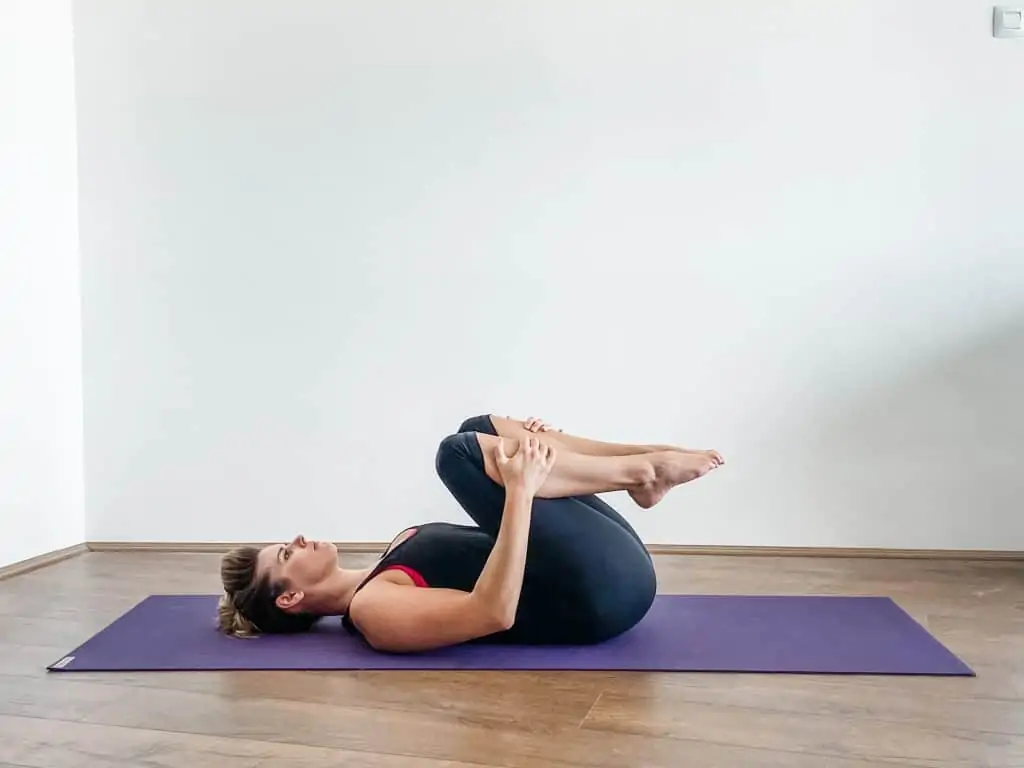
How to perform knees to chest
- Lie on your back and slowly draw one or both knees into your chest
- Hold for 20-30 seconds – continue to take deep breaths.
- Repeat 2-3 times
Wrapping up
Regular movement focusing on mobility and strength is one of the best ways to recover and keep back pain away.
Join me for a quick yoga class below to combine these stretches into an easy practice!
References
Casiano VE, Sarwan G, Dydyk AM, et al. Back Pain. [Updated 2023 Feb 20]. In: StatPearls [Internet]. Treasure Island (FL): StatPearls Publishing; 2023 Jan-. Available from: https://www.ncbi.nlm.nih.gov/books/NBK538173/